1. Have Visual Studio 2005 installed.
2. Download the Microsoft Cluster Compute Pack SDK from the following address and install it.
http://www.microsoft.com/downloads/details.aspx?familyid=d8462378-2f68-409d-9cb3-02312bc23bfd&displaylang=en
3. Open Visual Studio 2005.
4. Create a "New Project" by going to the File menu, select New, and select Project.
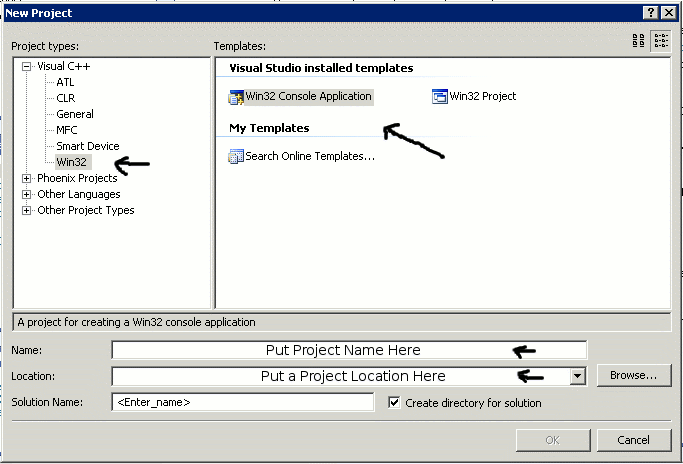
5. Select "Visual C++" and then "Win32" from the menu on the left. Select "Win32 Console Application" on the right. Enter a location to save the project and name the project. Then press OK. These steps are illustrated in the picture below.

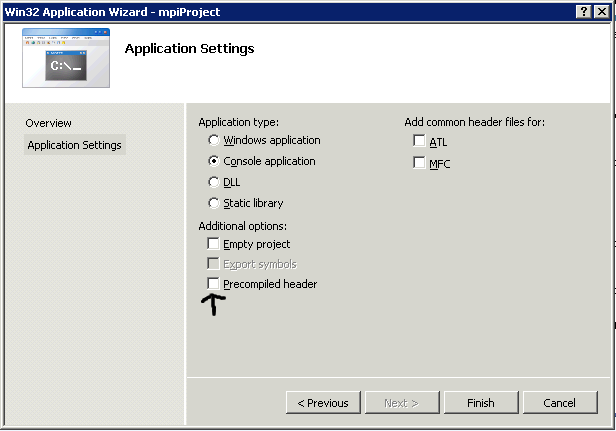
6. In the wizard, click the "Next >" button.
7. Uncheck the "Precompiled header" checkbox and press the "Finish" button. The things that should be selected are shown in the following picture.

8. The project will now be created. In the .cpp file, change the given "_tmain" to "main" and change "_TCHAR* argv[]" to "char* argv[]" so it is compatible with the MPI_Init call.
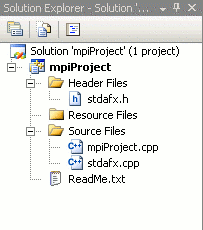
9. You can delete the files what you do not need in the "Solution Explorer" (shown below) on the left. If it is a C program, you can probably delete "stdafx.h" and "stdafx.cpp". Also be sure to remove the #include from the .cpp file if you do this. To delete a file, right click on it and select "Remove". To add a file, right click on the correct directory, select "Add", and then select either "New Item..." or "Existing Item..."

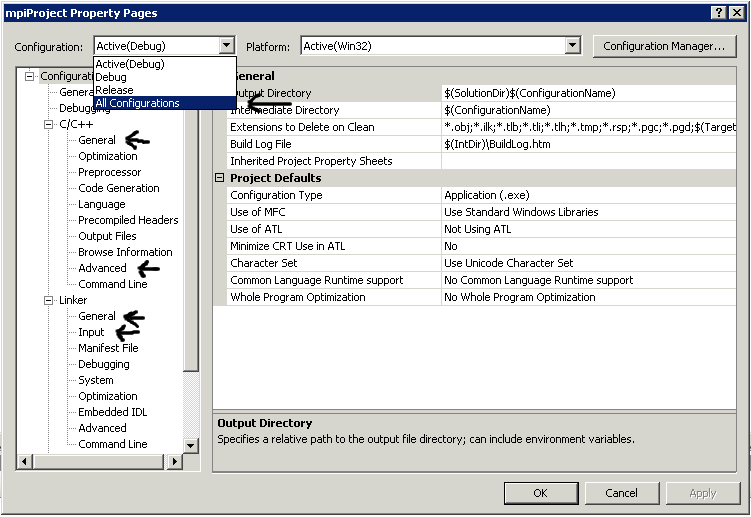
10. Right click on the project in "Solution Explorer", mpiProject in the above image, and select "Properties". Highlight and expand "Configuration Properties" on the left.

11. Input your program and compile it by selecting "Build Solution" from the "Build" menu at the top of the screen.